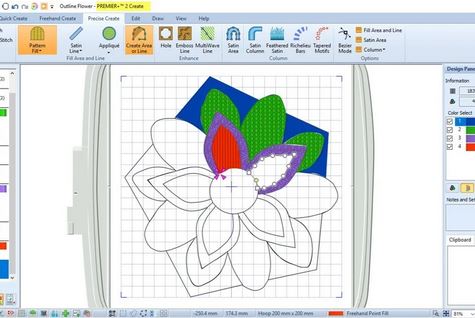
Embroidery enthusiasts know that the perfect design often needs to be adjusted to fit different projects. Whether you’re working on a hat, a shirt, or a tote bag, resizing your embroidery design is an essential skill. Hatch Embroidery Software is a powerful tool that makes this process simple and effective. In this blog, we’ll walk you through the steps to resize your designs using Hatch Embroidery Software.
Why Resize Design is Important in Embroidery
Resizing your embroidery design is not just about making it fit a particular space; it also involves ensuring that the design remains proportionate, the stitch density is correct, and the overall quality is maintained. Improper resizing can lead to distorted designs, loose stitches, or overly dense areas that may ruin your fabric. Hatch Embroidery Software offers tools to help you resize designs while maintaining their integrity.
Step 1: Open Your Design in Hatch Embroidery Software
- Launch Hatch Embroidery Software: Start by opening Hatch Embroidery Software on your computer.
- Load Your Design: Go to the “File” menu and select “Open” to load your embroidery design. You can choose from various file formats supported by Hatch.
Step 2: Select the Design
- Click on the Design: Once your design is loaded, click on it to select it. You’ll see a bounding box with handles appear around the design, indicating that it’s selected and ready for editing.
Step 3: Resize the Design
- Proportional Resizing: To resize the design proportionally (keeping the width and height ratio the same), click on any of the corner handles and drag inward to make the design smaller or outward to make it larger.
- Custom Resizing: If you need to resize the design non-proportionally (changing the width or height independently), hold down the “Shift” key while dragging the handles on the sides or top/bottom of the bounding box.
Step 4: Adjust Stitch Density
When you resize a design, the stitch density might change, which could affect the final outcome. Hatch Embroidery Software has built-in tools to automatically adjust the stitch density when resizing.
- Automatic Stitch Recalculation: Go to the “Object Properties” panel and ensure that the “Auto Stitch Recalculation” option is checked. This feature recalculates the stitches to match the new size of your design, preventing issues like overly dense or sparse stitching.
- Manual Adjustment: If you prefer, you can manually adjust the stitch density by selecting the “Stitch” tab in the “Object Properties” panel and entering your desired stitch length and density.
Step 5: Preview and Save Your Design
- Preview Your Design: Before finalizing, use the “TrueView” option to preview how your resized design will look when stitched out. This helps you catch any potential issues with the resized design.
- Save Your Design: Once satisfied, save your resized design by going to the “File” menu and selecting “Save As.” Choose the appropriate file format and save it to your desired location.
Here are some examples of finished designs.
Step 6: Test Your Resized Design
Before stitching the resized design onto your final project, it’s a good practice to run a test stitch on a similar fabric. This helps you verify that the resizing process has been successful and that the design stitches out as expected.
Tips for Successful Resizing
- Keep Proportions in Mind: Always try to resize designs proportionally to avoid distortion.
- Use the Right Tools: Hatch’s “Auto Stitch Recalculation” is invaluable for maintaining design integrity.
- Test, Test, Test: Always test your design after resizing to ensure the best results.
Conclusion
Resizing embroidery designs in Hatch Embroidery Software is a straightforward process when you know the right steps. By following this guide, you can confidently adjust your designs to fit any project, ensuring that they stitch out beautifully every time. With Hatch, you have the flexibility and tools needed to bring your creative visions to life, no matter the size or scale.
Here are some comparisons of softwares used for embroidery.


Leave a Reply